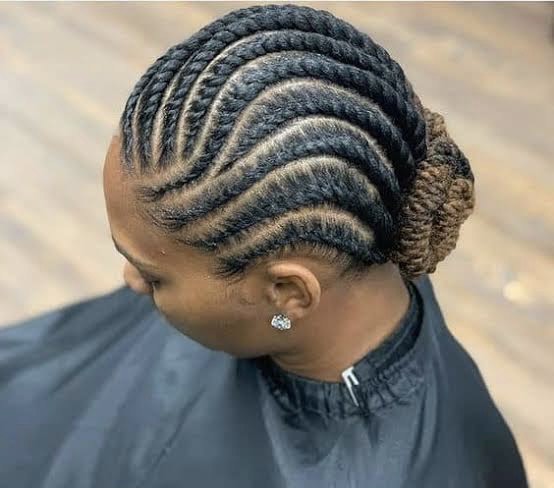
Flat twists are the most effortless protective style for all seasons. A flat twist combines two-strand twists and cornrows in one hairstyle. It involves intertwining two strands of hair on top of each other to form a rope-like weave. You don’t necessarily need to head over to the salon for these and while they’re a simple and neat style, they are more user-friendly for beginners. They are also great to wear under your wigs. You can flat twist both long and short hair of all textures. But we find that the right hair products make the hairstyle last longer and look better.
To get a smooth look, It’s also best to work with stretched hair so that you can get a smooth look. You don’t have to do a blowout or use heat at all. You can just comb your hair out or work on hair that has been stretched out with other hairstyles such as a twist out, braid out, or even a bun.
Step By Step Guide On Achieving Flat Twists On Type 3-4 Hair.
Recommended Products:
Step 1
Start with shampooing your hair. I mean, you don’t want to start scratching your scalp only 5 minutes after styling your hair. Therefore grab some water and wash your hair and scalp.
Step 2
First, detangle your hair since it’s easier to work with that way. Watch how to detangle natural hair here. Next, take a tail comb and start parting your hair into smaller sections keeping in mind that the bigger the section, the less defined the curls/coils will be. Therefore determine the type of curl/coil definition you want first, then part your hair accordingly.
Step 3
Moisturize your hair by adding the curl-defining leave-in conditioner to the section you have parted. This will also help you easily detangle your hair. Next, add the hair and scalp serum to seal in all the moisture so that your hair stays moisturized for as long as you have the style on.
Step 4
It is best to twist your hair when damp and not dry or dripping wet. To do this, further, divide that section into two (one smaller than the other). Next, take the smaller section and twist it once, then add some more hair from the bigger section and twist till you have twisted the whole section.
Once you reach the ends, comb through and twist till the end. Then finally, wrap the remaining strand back towards the twist to seal it.
Step 5
Continue parting and twisting the rest of your hair until it’s all done. You will notice that it will get easier as you continue, so don’t give up!
A tip is to twist every strand in the same direction so that when you unravel, your hair looks neater rather than twisting in different directions and ending up with a messy head.
Step 6
Now that your twists are done, lay your edges (optional) and wrap your hair with a silk scarf or a silk bonnet. This will preserve all the moisture in your hair and protect your twists from unravelling if you will be having them on for some time. Remember that the longer the twists stay on, the more defined the curls will be. Therefore, it’s better to wait 2-3 days to unravel them or the next day rather than unravelling them after 20-30 minutes.
Step 7
To unravel, make sure you use some hair serum so that it doesn’t get painful or tangle. Then use a wide-tooth comb to pick up the roots- roots only! This will add some more volume to your hair and make it look even puffier.
Finally, style as desired. It could be a side part, updo, pigtails, or even a ponytail if your hair is on the longer side.
Side note: To achieve the best results when making flat twists, the star product is our Cupuacu Butter & Moringa Oil Moisturizing Leave-in Curl Defining Custard. It never misses!
Written By Social Butterfly Haven For Reina HairCare.


